Sunday, November 27, 2011
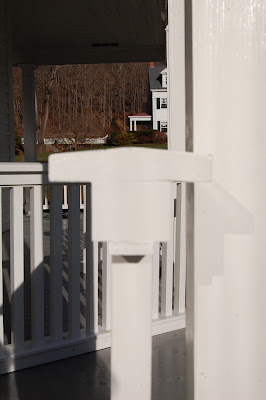
Finished Porch Railings
Here are the finished railings ready for install. The side view photo shows the slight angled pitch I put on the top rail. This allows the rain and snow to drain off which will add to the railings longevity.
Thursday, November 17, 2011
Painting Endgrains
Most rot damage on trim is cause by moisture being sucked up into any unpainted exposed endgrain. I always keep paint handy to seal the endgrains up good before I install any trim. These are usually in places a painter cant get to after installation. In this I case I painted the top and bottom endgrains of my ballisters before assembling my railings. Even though they wont be exposed to the weather, the added coat of paint will be one extra step against future rot damage.
Monday, November 14, 2011
Portable Planer
Some of my older house projects require the use of a portable planer to mill the wood to dimensions that are not in stock at the lumber yard. In this case the customer wanted the original dimensions retained for her porches cedar railings. The old porches original ballisters were 1 5/16 x 1 5/16 and the rail supports were 1 3/4 x 2 1/4 and 1 3/4 x 2 3/4 which are not in stock.
So I took a massive 6x6 and made the various rail supports, first ripping them on a tablesaw to rough size and then planing them to exact dimensions. I also did the same to some 1 1/2 x 1 1/2 cedar stock to get the 1 5/16 ballister size. This planer performs great and gets the job done quickly.
So I took a massive 6x6 and made the various rail supports, first ripping them on a tablesaw to rough size and then planing them to exact dimensions. I also did the same to some 1 1/2 x 1 1/2 cedar stock to get the 1 5/16 ballister size. This planer performs great and gets the job done quickly.
Saturday, November 12, 2011
Carport Transformation
You wouldn't know it by looking at it but this was an old carport we transformed into a simple usable heated space for a 98 year-old customer and her many plants. This project was completed in just under 2 weeks at a relatively low cost.
Subscribe to:
Posts (Atom)


